Creating the webpage
Creating the webpage
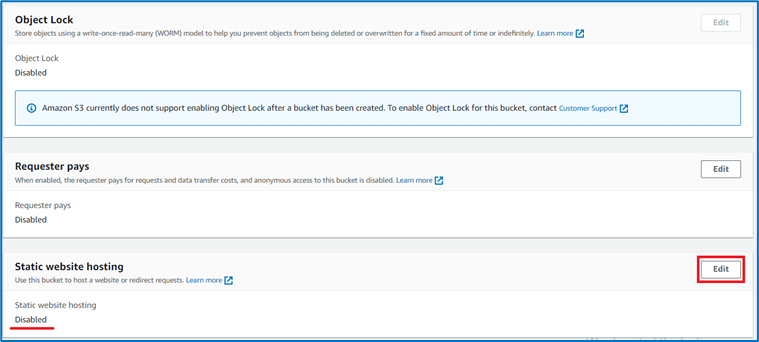
Step 13 : At the bottom is the area where Static website hosting settings are located. We press the edit button.
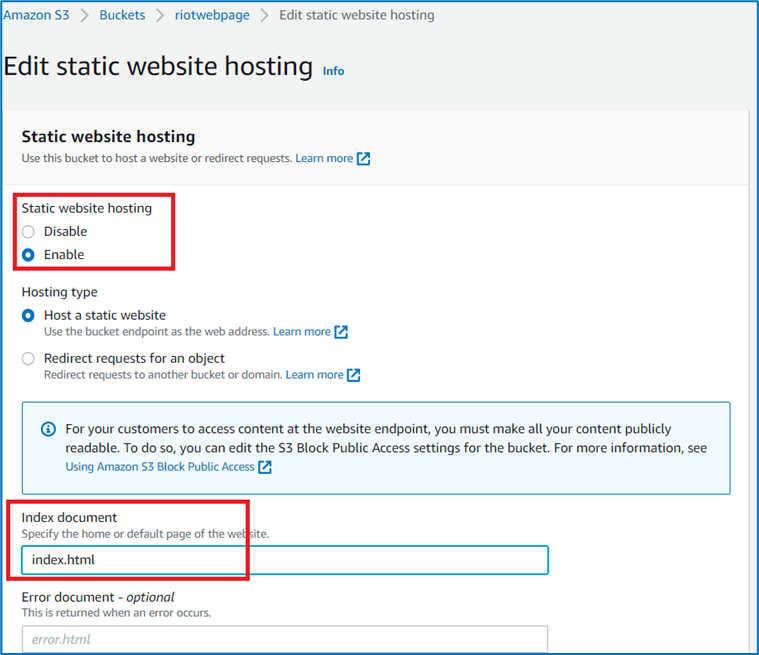
Step 14: We change the hosting setting from Disable to Enable . We write the name of the main html file of our website (index.html ) that we have prepared in the index document section. Then we exit by clicking the Save Changes button.
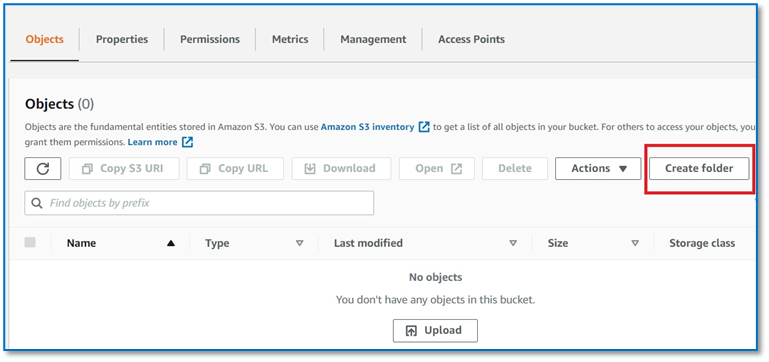
Step 15: Double click to enter the bucket. Now we can start storing objects in our bucket. In our application, we will create two nested folders and upload the files to the folder. Press the “Create Folder” button on the screen to create the folder.
Step 16 : Give your folder a name ( we gave it Project File ). Then we create our folder by clicking the “Create Folder ” button.
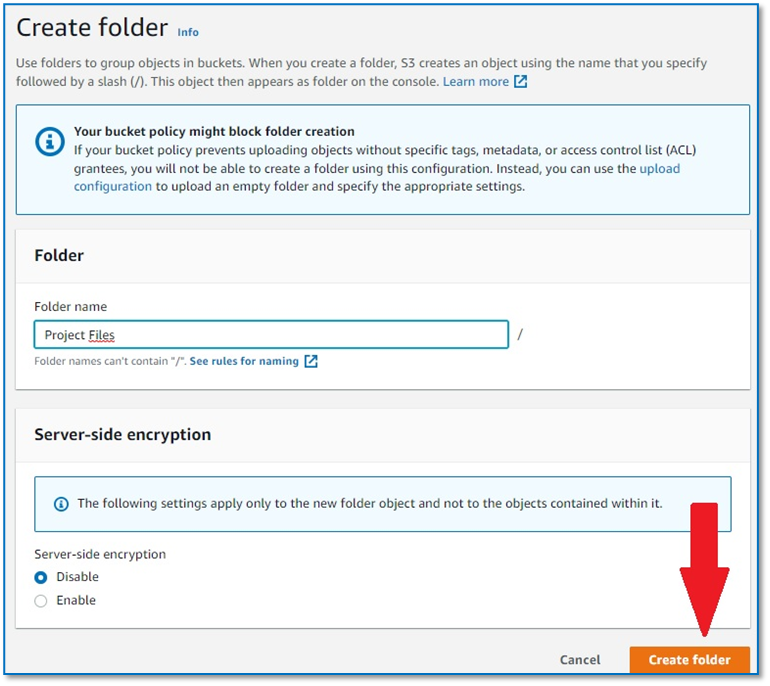
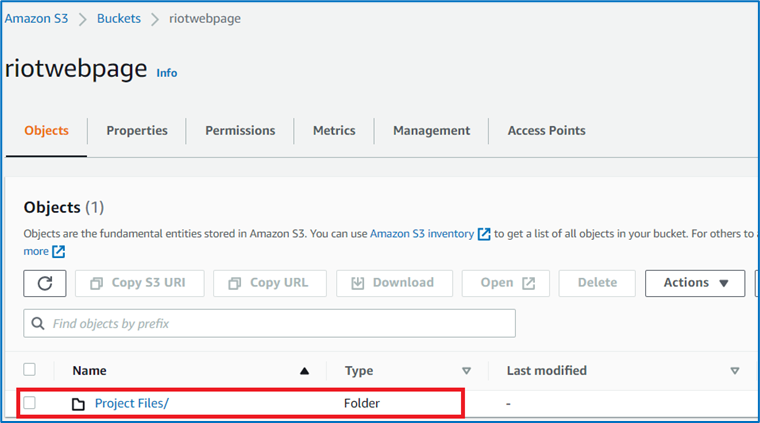
Step 17: The created folder appears in our bucket ( Project Files ). Double click to enter this folder.
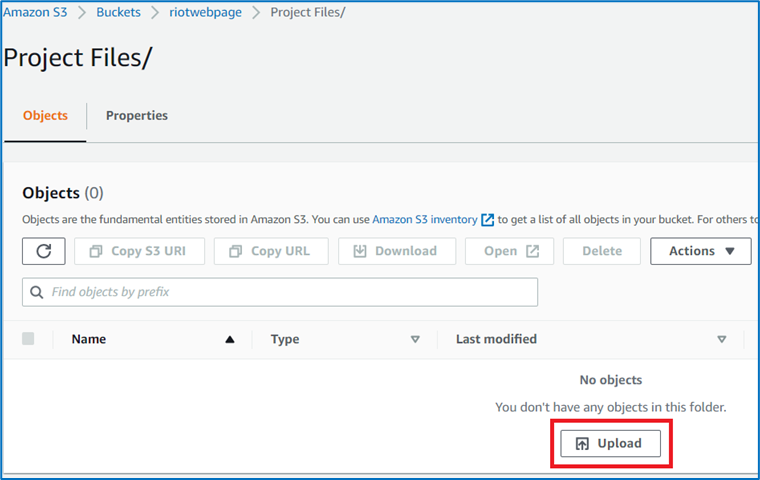
Step 18: Now we can upload all the files to the new folder. Please click the “Upload” button
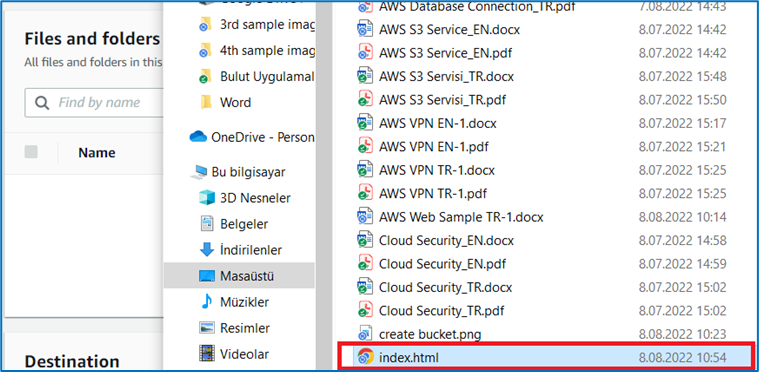
Step 19: You can click on the “Add file ” button or Drag and Drop Files option by pressing the file you want to upload from the screen .
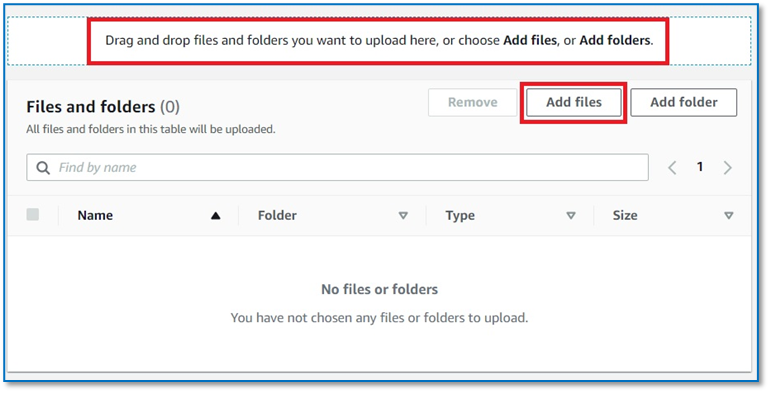
Step 20: Now you can choose your files to upload to the folder in your folder. Then we need to give approval for the upload process. To do this, click the Upload button at the bottom of the page .
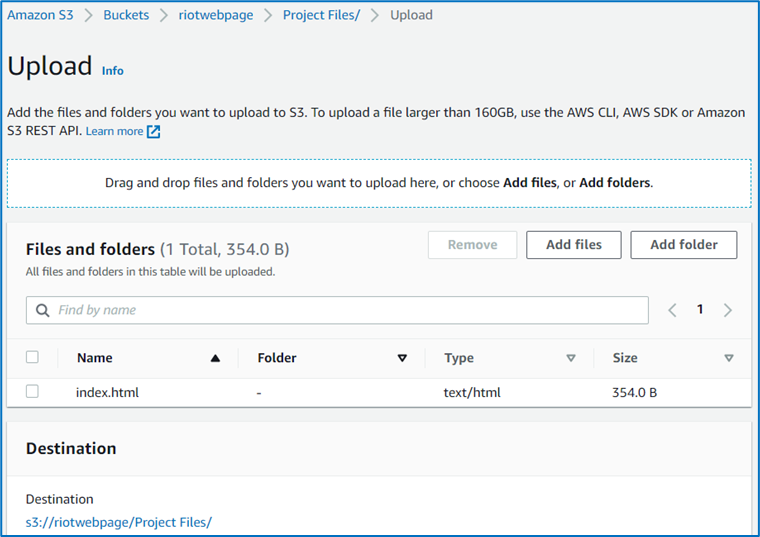
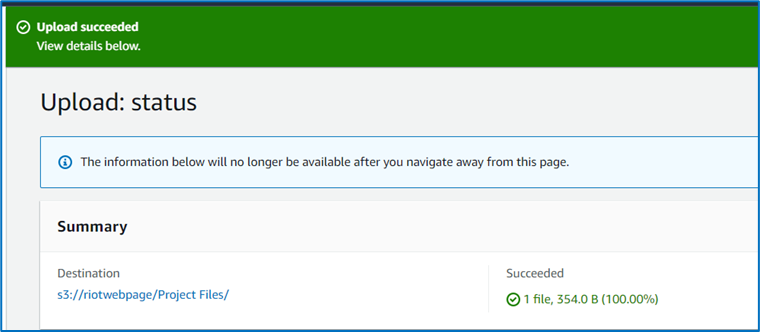
Step 21: The confirmation page for the downloaded file is displayed. You can exit this window by clicking the Close button.