Microsoft Azure
Microsoft Azure portal
Microsoft Azure
The Microsoft Azure portal (https://portal.azure.com/) is the place from where we manage all Azure services. The home page shows the available services and is the place where we will start our lab by clicking the Azure SQL icon:

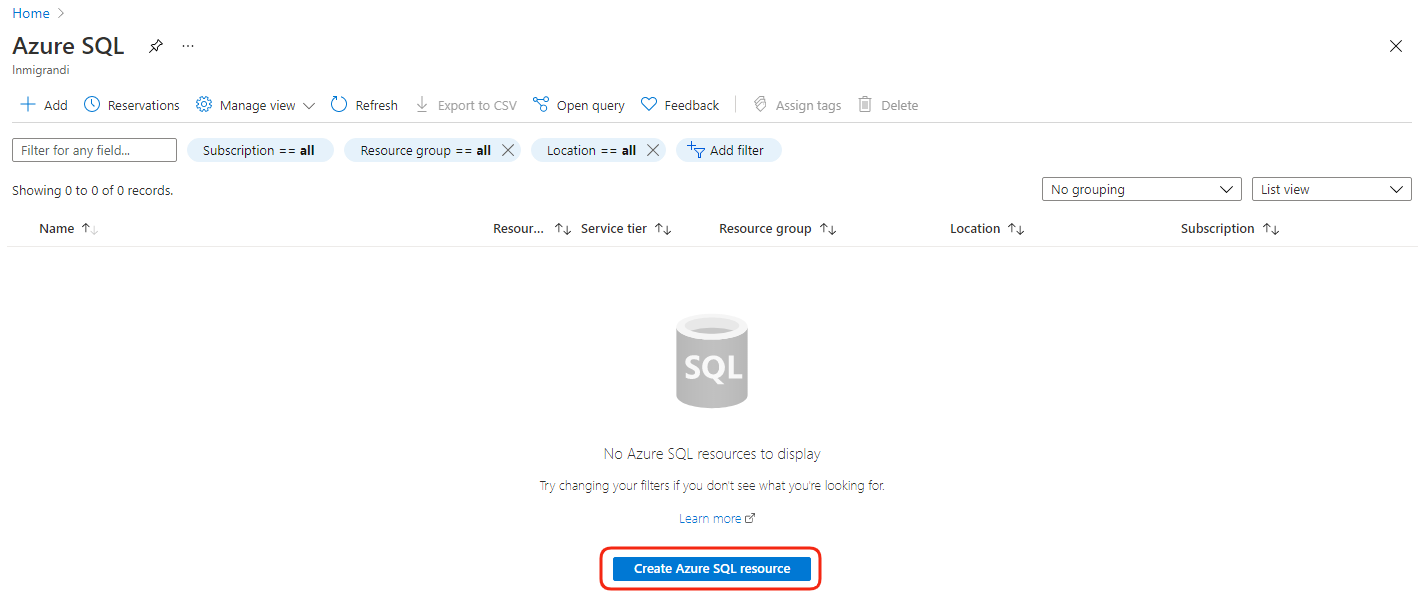
From the Azure SQL page, let’s click the Create Azure SQL resource blue button:
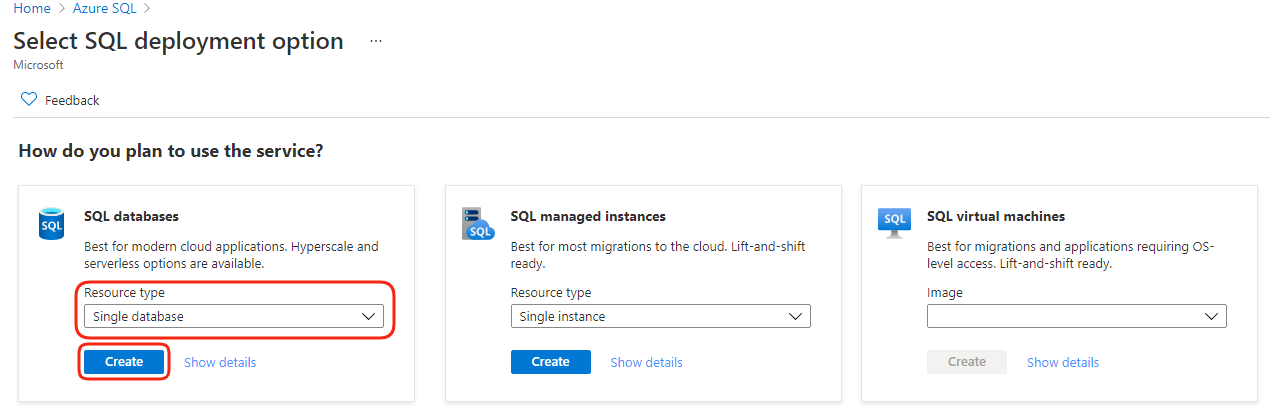
Under SQL Databases block (the first block), leave Resource type set to Single database, and then click on the Create blue button:
Now we are going to create the database. Under the Basics tab, the following screen shows the fields we need to select or fill:
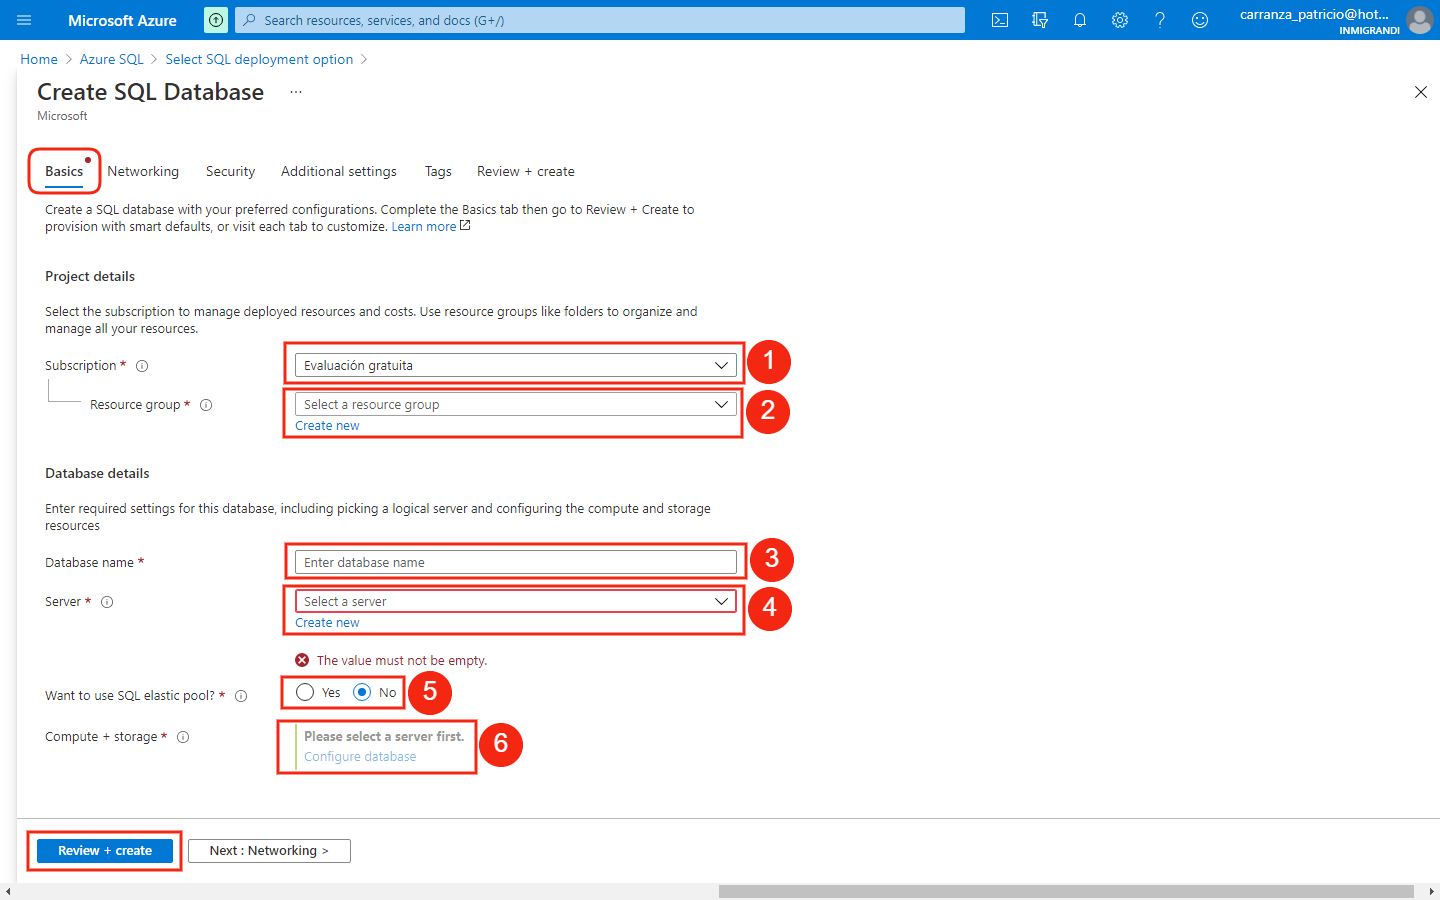
- Select Free evaluation as Azure Subscription.
- In the Resource group, select Create new and enter myResourceGroup as the name.
- Enter ccDatabase as the Database name.
- For the Server, click Create new and fill the form with the following data:
- Enter a unique server name. In this case, we choose ccsqlserver0546.
- Enter the Server admin login: ccazureuser.
- Enter and confirm a Password. (Choose a password that meets the requirements.)
- Select a Location and click the Ok blue button.
- Keep Want to use SQL elastic pool set to No.
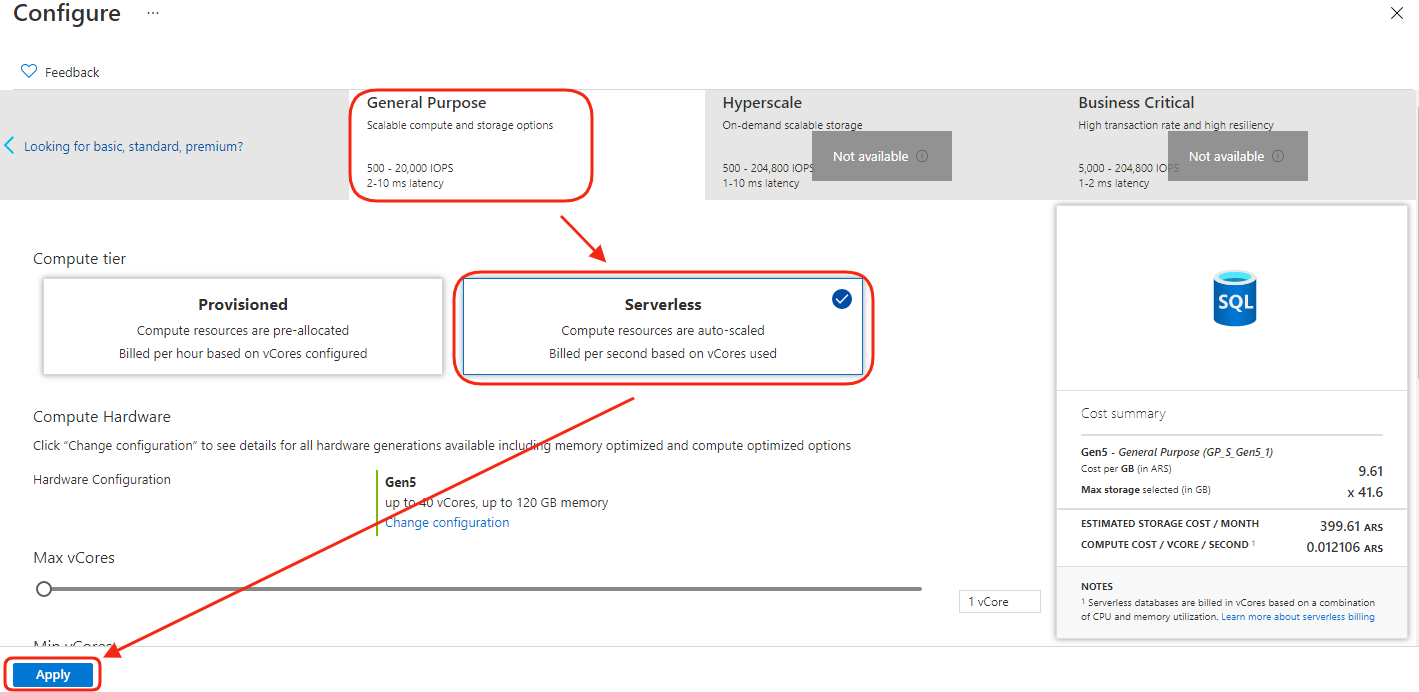
- Under Compute + storage, select Configure database and then choose General Purpose and Serverless. Finally, click the Apply button:
Now we have to select Next: Networking > at the bottom of the page:

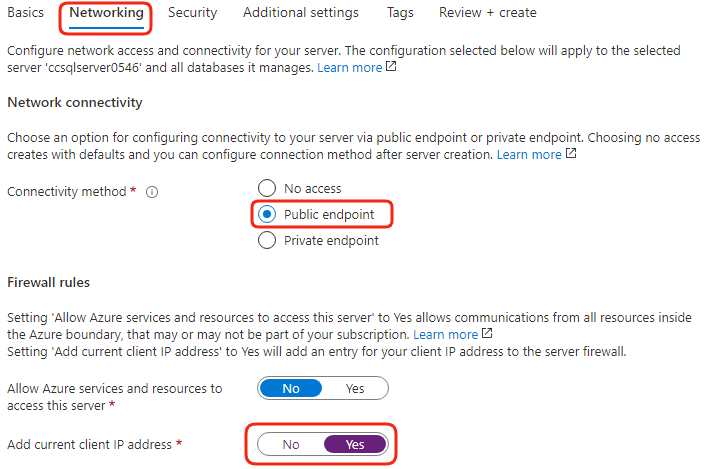
On the Networking tab, select Public endpoint as the Connectivity method, and for Firewall rules, set Add current client IP address to Yes:
At the bottom of the page, click on Select Next: Additional settings:

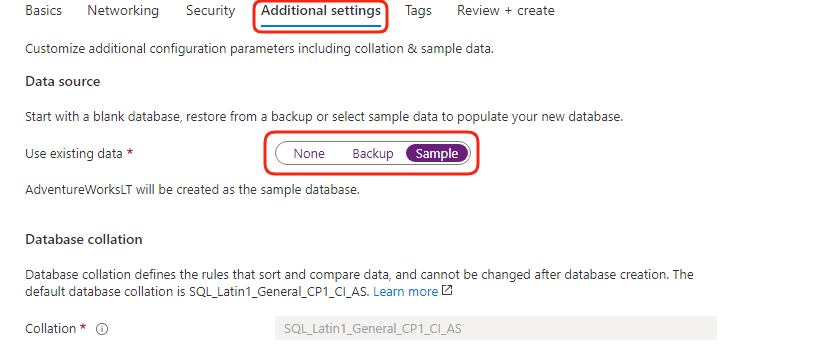
On the Additional settings tab, in the Data source section, select Sample for Use existing data. (This will create a sample database for test purpose):
Finally, click on Review + create at the bottom of the page. On the Review + create page, click the Create blue button:

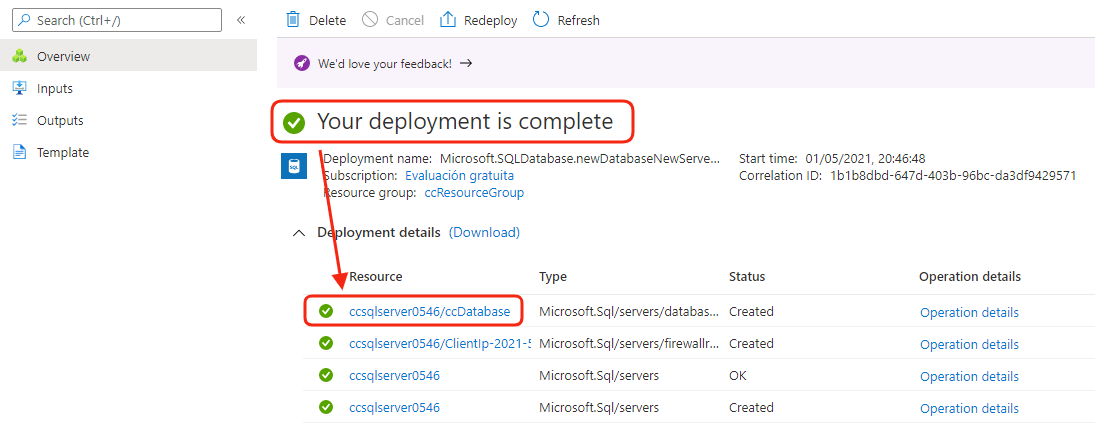
When the creation process is complete, the screen shows the new database: