
Microsoft Azure Storage
Microsoft Azure Storage
A storage account is a resource in Azure Resource Manager (Azure's management and deployment service). All Resource Manager resources must belong to a resource group, a logical container for grouping Azure services. We will start by creating a new resource group:
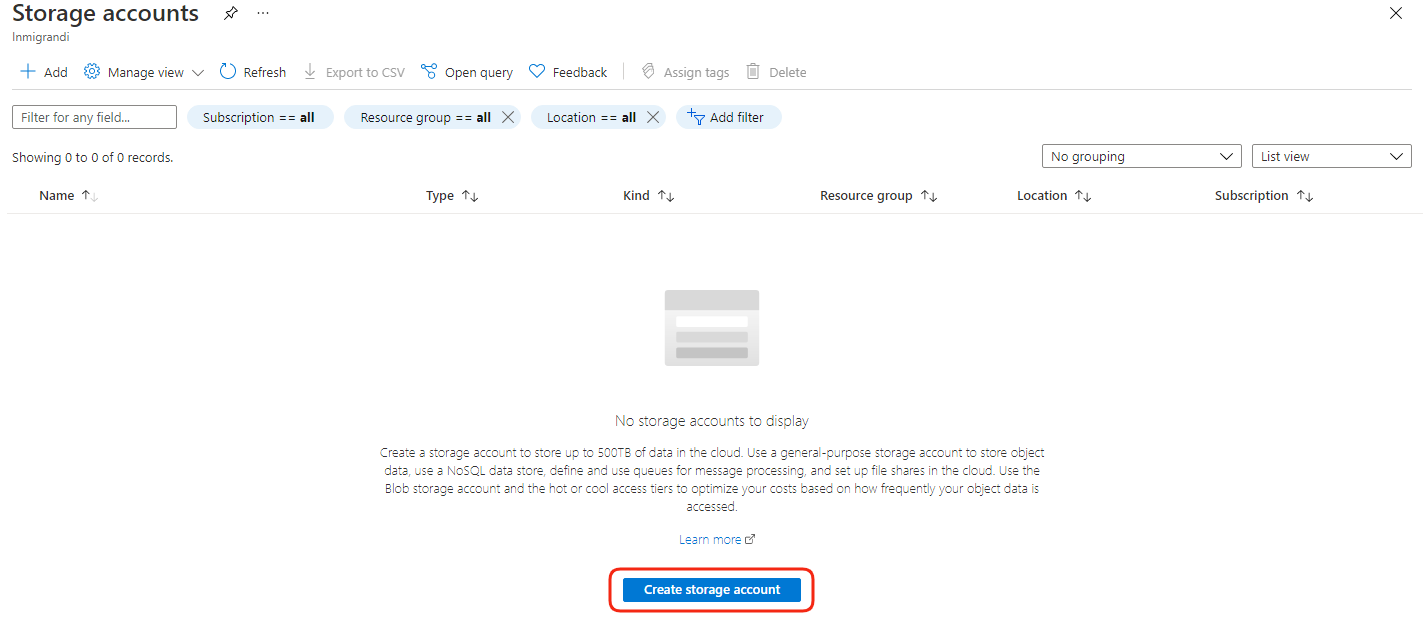
In the portal menu on the left, select Storage Accounts and, on the Storage Accounts page, click on the Create storage account blue button in the lower part of the page:
On the Basics tab, we will provide the information for the storage account:
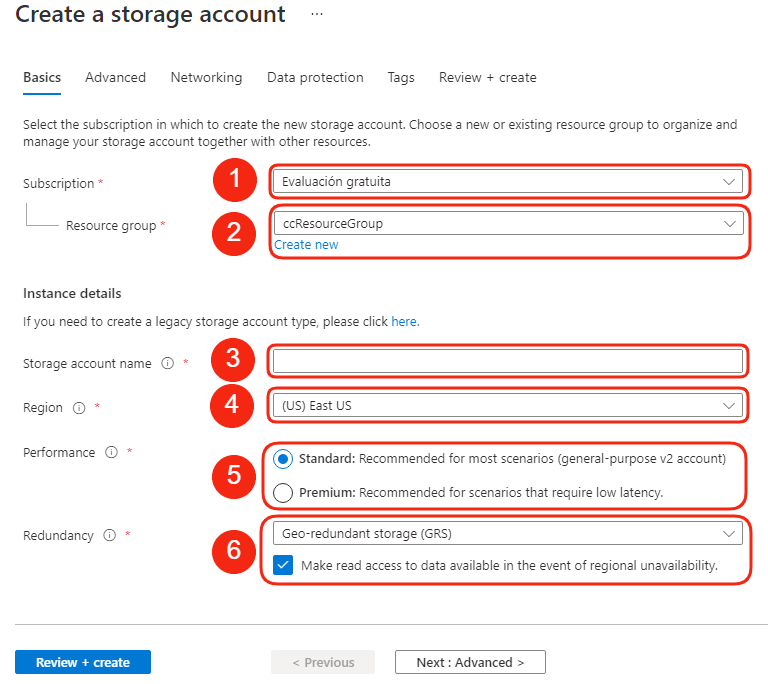
- Here we select the type of subscription for the new storage account.
- Select the existing resource group for the storage account (ccResourceGroup).
- Let’s assign a unique name for the storage account (numbers and lowercase letters only).
- Now we select the region for the storage account.
- Keep Standard selection here.
- Select a geo-redundant configuration (GRS or GZRS) for redundancy. Data replicates to a data centre in a different region.
Since the Basics tab includes the necessary information to create the new account, there are more tabs for advanced configuration:
- Advanced tab: to configure additional options and modify default settings for the new storage account.
- Networking tab: can configure network connectivity and routing preference settings for the new storage account.
- Data protection tab: to configure data protection options for blob data in the new storage account.
- Tags tab: here, you can specify Resource Manager tags to help organise your Azure resources.
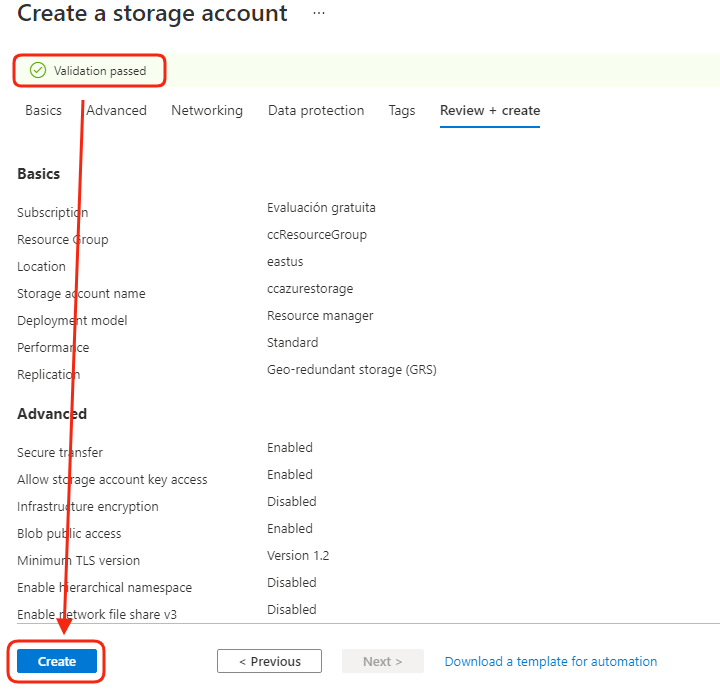
- Review + create tab: When navigating to the Review + create tab, Azure runs validation on the storage account settings.
If validation passes, we can proceed to create the storage account by clicking on the Create blue button:
A few minutes later, the resource creation completes, and we are ready to go to the resource page:
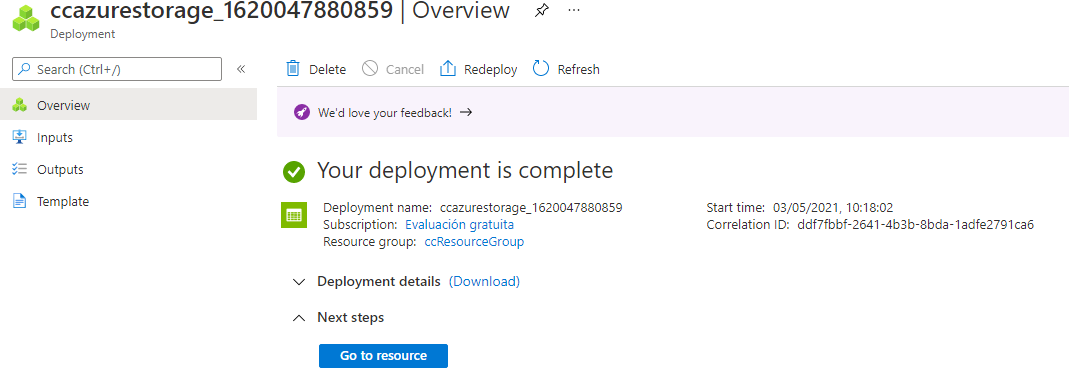
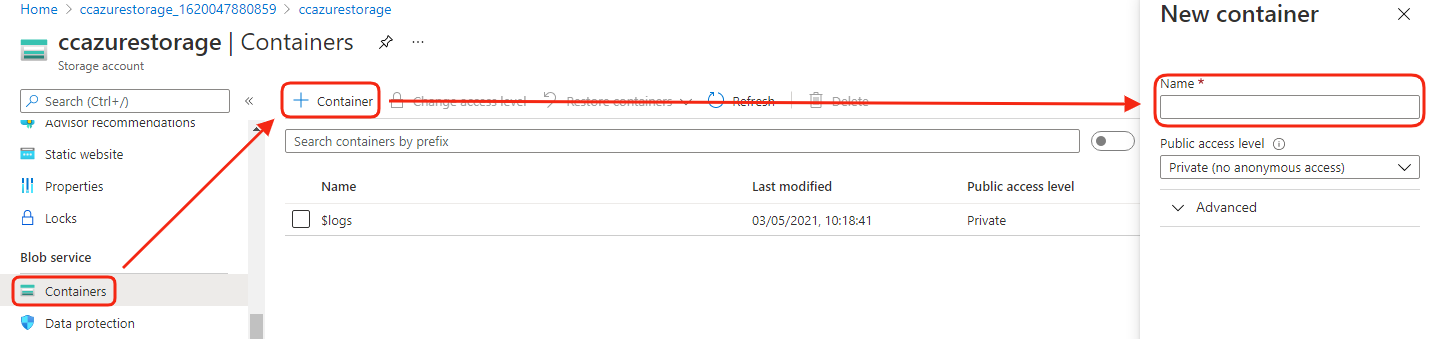
After clicking on the Go to resource blue button, we are ready to create our first container (a kind of repository where we can upload unstructured data). To do that, we need to click on the Containers option from the left menu and then click on the plus sign to create the container (we will name it mycontainer):
The container is now ready to receive data. Let’s click on the container name:

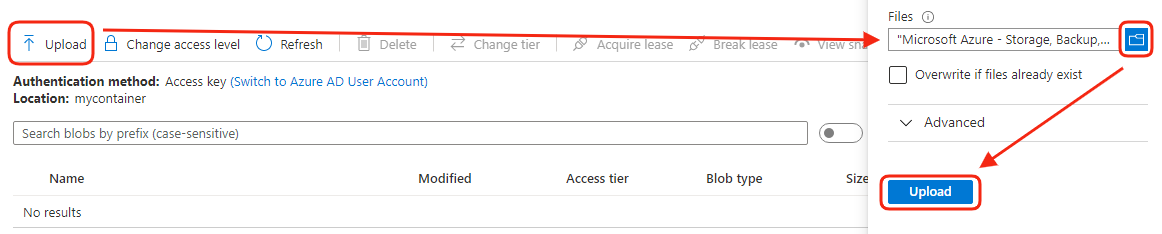
The first option in the upper menu let us upload files into the container. On the right side of the screen, select the file and click the Upload blue button:
Now, our file is uploaded and secure in the Azure Storage:
